Hi everybody! I hope everyone's having a great December and an overall wonderful holiday season! I'm trying to get back into posting makeup looks/tutorials, but I'm dry of inspiration- please, PLEASE if there's anything that you want to see, let me know! It can be a tutorial of a look I've done, any type of makeup look, or a tutorial of just any look you want to see. Don't be shy!
Anyways, I was contacted by the UK brand
Eyeko a while back. They asked me to review their nail polish and a couple of other things (for another post!). Here's part 1: the nail polish.

Let's get to the first part: aesthetics. Aren't the bottles adorable? I love the cheeky labels. However, the shape of the bottles isn't very practical. They're extremely easy to tip over.


Eyeko Saucy Polish
My favorite of the bunch! A vivid, crisp red creme. Lately I've been really into these bright red cremes, and this one did not disappoint! Very flattering. This was two coats, and it had the best formula of the bunch. However, is this polish necessary to own? Not if you own one of these red cremes:

OPI's Vodka & Caviar is almost identical- but it's more of a jelly than a creme. Closer is Essie's Limited Addiction which is a 3 coat creme. OPI Color So Hot it Berns is quite different- I don't know why I included it, haha. So if you own V&C or LA, you don't need Saucy.


Eyeko Rain Polish
Unfortunately, this had the worst formula out of the bunch. It was thick but runny. A big glob of polish threatened to drip on the table any time I took the brush out of the bottle. However, I like the color a lot. This was 2 coats but after looking at these pictures, it needed 3.

Eyeko Tea Rose Polish
My second favorite! A beautiful dusty yet vivid (what a contradiction!) rose colored polish. I love these types of grandma polishes. The formula was so-so, and this was 2 coats. I should try this on my toes sometime!

Eyeko Petite Polish
A pretty yet basic sheer pink. This was 3 coats with the same runny but thick formula. I like this polish- it'd be perfect for my work (our nails have to look really clean, preferably no polish but I make do with "my nails but better" colors :P).

Eyeko Posh Polish
Your standard taupe/greige color. Pretty but nothing unique. This also had a so-so formula. I used 2 coats. Do you need this polish?

According to my crappy comparision, yes. But all in all, I don't think you do. OPI Over the Taupe is more warm while Posh is more cool. I included YDKJ because pretty much everyone knows what that looks like! There's so many taupes out there, I'm sure you could find a dupe for Posh that's easier to find.
So overall, Eyeko gets points for their adorable bottles/labels but gets knocked down a couple points for the bottles' impracticality, (most of) the polishes' bad formulas, and lack of originality.
The last statement is debatable- Eyeko sent me typical, overdone colors but on their website they have some awesome colors. For example, I love their
Military Polish,
Vintage Polish, and
Coral Polish.
While Eyeko's polishes may fall flat, their makeup is much more superior. One of their products is actually my HG for my face makeup! You'll have to wait and see what it is :)
Big thanks to Eyeko for sending me these products and letting me try their brand!


 Let's get to the first part: aesthetics. Aren't the bottles adorable? I love the cheeky labels. However, the shape of the bottles isn't very practical. They're extremely easy to tip over.
 Eyeko Saucy Polish
 OPI's Vodka & Caviar is almost identical- but it's more of a jelly than a creme. Closer is Essie's Limited Addiction which is a 3 coat creme. OPI Color So Hot it Berns is quite different- I don't know why I included it, haha. So if you own V&C or LA, you don't need Saucy.
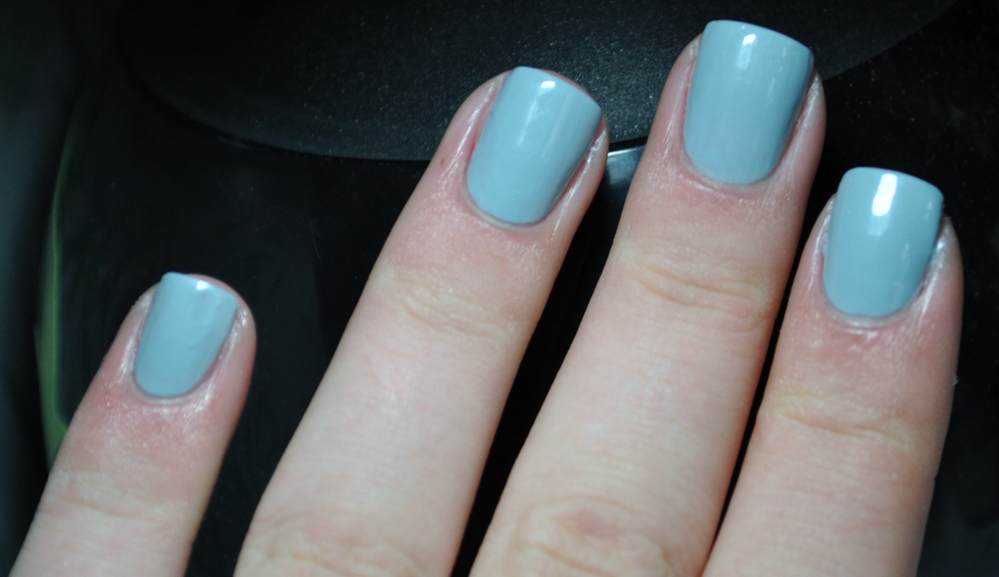 Eyeko Rain Polish
 Eyeko Tea Rose Polish
 Eyeko Petite Polish
 Eyeko Posh Polish
 According to my crappy comparision, yes. But all in all, I don't think you do. OPI Over the Taupe is more warm while Posh is more cool. I included YDKJ because pretty much everyone knows what that looks like! There's so many taupes out there, I'm sure you could find a dupe for Posh that's easier to find.


